When summer hits and the oven stays off, these No-Bake Lemon Cheesecake Jars are my go-to treat. They’re creamy, zesty, and perfectly portioned in cute little mason jars—making them ideal for everything from backyard BBQs to last-minute weeknight desserts.
What I love most? They come together in just 10 minutes with no baking and minimal mess. It’s an easy no-bake lemon dessert that feels special but couldn’t be simpler. Plus, the tangy lemon flavor is so refreshing, even picky eaters ask for seconds.
Whether you’re planning a party or just need a sweet win after a long day, this mason jar dessert idea is one you’ll come back to all summer long.
Table of Contents
Recipe Card
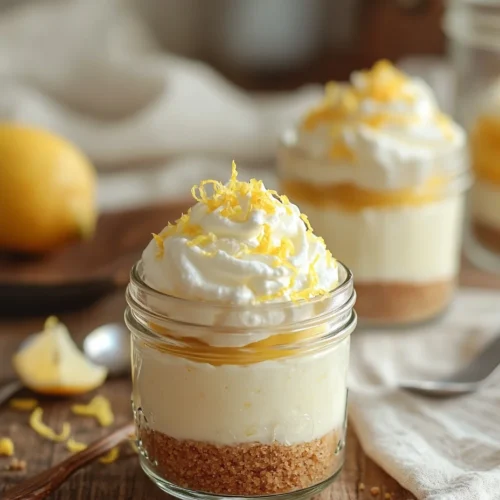
No-Bake Lemon Cheesecake Jars (Mason Jar Dessert Idea)
Equipment
- Mixing bowls
- Hand mixer or whisk
- Mason jars (small, 4 to 6)
Ingredients
- Amount Unit Name Notes
- 1 cup graham cracker crumbs
- 3 tbsp melted butter
- 1 tbsp honey or maple syrup for crust
- 1 cup cream cheese softened
- 1/2 cup Greek yogurt plain or vanilla
- 1/4 cup lemon juice freshly squeezed
- 1 tbsp lemon zest
- 1/3 cup powdered sugar adjust to taste
- 1 tsp vanilla extract
Instructions
- In a bowl, mix the graham cracker crumbs, melted butter, and honey until combined. Divide the mixture between your mason jars and press down to form a crust.
- In another bowl, beat the softened cream cheese until smooth. Add the Greek yogurt, lemon juice, zest, powdered sugar, and vanilla. Mix until creamy and fluffy.
- Spoon or pipe the cheesecake filling on top of the crust in each jar.
- Refrigerate the jars for at least 2 hours, or until set.
- Before serving, add optional toppings like lemon curd, whipped cream, crushed cookies, or fresh berries.
Notes
- You can make these up to 2 days in advance. If using lemon curd or fruit, add just before serving for best texture.
- For a lighter version, use low-fat cream cheese.
Why You’ll Love These No-Bake Lemon Cheesecake Jars
If you’re looking for a dessert that’s quick, refreshing, and just the right amount of fancy, these no-bake lemon cheesecake jars are a total win. Here’s why they’re a favorite in our house (and might just be your new go-to too!):
- No oven, no stress – This easy no-bake lemon dessert means no hot kitchen and no baking drama. Just mix, layer, and chill!
- Zesty and creamy – The combo of fresh lemon juice, Greek yogurt, and cream cheese hits the perfect balance of tangy and smooth.
- Perfect for parties – These individual lemon cheesecakes look adorable in mason jars and are great for showers, picnics, or even weeknight treats.
- Fun for kids to help – Let them press the crust or add toppings—it’s a fun mason jar dessert idea the whole family can enjoy.
- Make-ahead friendly – Chill these cuties in advance and have a lemon cheesecake in a jar ready whenever dessert cravings strike.
- A little health boost too – Did you know lemon is naturally rich in vitamin C and supports digestion and immunity? It’s not just there for the flavor—it brings a refreshing dose of feel-good benefits to every bite. [source]
Ingredients You’ll Need
These no-bake lemon cheesecake jars are the kind of treat busy moms dream of—simple pantry staples, no oven, and total crowd-pleasers. Everything comes together in a snap, with bright citrus flavor and creamy cheesecake goodness layered into sweet little jars.
- Graham cracker crumbs: The crunchy base for your cheesecake jars, just like a traditional crust but easier.
- Melted butter: Combines with the crumbs to form the perfect no-bake crust.
- Honey or maple syrup: Adds a natural touch of sweetness and helps hold the crust together.
- Cream cheese: The heart of any good cheesecake—rich, smooth, and perfect for these jars.
- Greek yogurt: Lightens the filling and adds a slight tang that pairs beautifully with lemon.
- Fresh lemon juice: Gives your no-bake lemon cheesecake jars that irresistible zesty flavor.
- Lemon zest: Doubles down on the citrus and adds a fragrant brightness.
- Powdered sugar: Keeps the filling sweet and smooth.
- Vanilla extract: Adds warmth and depth to balance the tangy lemon.
- Optional toppings: lemon curd, whipped cream, crushed cookies, or fresh berries for a cute finish.
How to Make No-Bake Lemon Cheesecake Jars
Making these no-bake lemon cheesecake jars is easier than you’d think—no fancy equipment, no water baths, and no baking required! Just five simple steps to creamy, citrusy happiness:
- Make the crust
Stir together the graham cracker crumbs, melted butter, and sweetener until the texture is like wet sand. Divide it evenly into mason jars and press down to form a crust. - Whip up the filling
In a mixing bowl, beat the cream cheese until smooth, then mix in the yogurt, lemon juice, zest, powdered sugar, and vanilla. The filling should be fluffy and bright. - Layer it up
Spoon or pipe the lemon cheesecake filling over the crust in each jar. Smooth the tops with a spoon or spatula. - Chill until set
Pop your jars in the fridge for 1–2 hours (or more!) to let the flavors meld and the filling firm up. - Add toppings and serve
Top each lemon cheesecake in a jar with whipped cream, lemon curd, berries—whatever you love—and serve chilled!
Mom Tips from Olivia
You know me—I’m all about shortcuts that still feel special. Here are my tried-and-true tips to make sure your no-bake lemon cheesecake jars turn out perfect every time:
- Use room-temp cream cheese
Cold cream cheese can get lumpy, so let it soften first for that dreamy, smooth texture. - Fresh lemon juice > bottled
Trust me, the fresh stuff makes a huge difference in that zingy, summer dessert with lemon flavor. - Pipe the filling for a cleaner look
If you want a picture-perfect presentation, spoon the filling into a zip-top bag, snip the corner, and pipe it into the jars. - Make ahead for easy entertaining
These jars keep beautifully in the fridge for a few days, so they’re great to prep ahead for parties or weeknight cravings. - Let the kids decorate
Set out a few toppings like crushed cookies, berries, or sprinkles and let the little ones get creative. Dessert and a fun activity? Win-win.
How to Serve No-Bake Lemon Cheesecake Jars
These no-bake lemon cheesecake jars are as flexible as they are adorable. Whether you’re hosting a crowd or just need a weekday treat, here’s how I love to serve them:
- At summer gatherings – Set them out in a tray with a bowl of berries and mini spoons. They’re a crowd-pleasing mason jar dessert idea that keeps everyone happy and cool.
- For brunches or showers – Add a swirl of lemon curd and a mint leaf for a dressed-up look. They’re just fancy enough without the fuss.
- Weeknight desserts – Serve straight from the fridge after dinner. You’ll love having an easy no-bake lemon dessert on hand that’s ready to go.
- Kid-friendly fun – Let your little helpers pick their own toppings and decorate their individual lemon cheesecakes. Makes dessert feel like an activity!
- Giftable treats – Tie a little ribbon around each jar and deliver them as sweet homemade gifts for teachers, neighbors, or new moms.
How to Store No-Bake Lemon Cheesecake Jars
One of the best parts about these no-bake lemon cheesecake jars? They’re totally make-ahead friendly and perfect for busy weeks or party prep. Here’s how to store them so they stay fresh and delicious:
- Refrigerator:
Keep your cheesecake jars tightly covered in the fridge for up to 4 days. The flavors get even better after a day of chilling! - Make ahead:
Assemble the full jars (minus toppings) and stash them in the fridge. Add your whipped cream or fruit just before serving to keep things fresh. - Not freezer-friendly:
Because of the yogurt in the filling, freezing changes the texture. These are best enjoyed chilled, not frozen.
These little lemon cheesecake in a jar treats are so handy when you need a ready-to-go dessert. Pop one out after dinner or serve them straight from the fridge at your next BBQ!
Taste & Texture of No-Bake Lemon Cheesecake Jars
Every spoonful of these no-bake lemon cheesecake jars is a little moment of joy. They’ve got that classic cheesecake creaminess you crave—smooth, rich, and fluffy thanks to the combo of cream cheese and Greek yogurt.
Then there’s the lemon. Oh, the lemon! Bright, zesty, and fresh, it cuts through the richness with just the right pop of tangy sunshine. It’s a summer dessert with lemon that feels refreshing, not heavy.
And don’t forget the crust! The buttery graham layer at the bottom adds a slight crunch and honeyed warmth that balances everything perfectly. Whether you’re scooping it straight from the jar or savoring every layer, this easy no-bake lemon dessert hits all the right notes.
Frequently Asked Questions
How do I thicken no-bake cheesecake filling?
Make sure your cream cheese is full-fat and not overly softened. Let the jars chill for at least 2 hours, or mix in a spoonful of whipped topping or powdered gelatin for extra firmness.
How long does no-bake cheesecake take to set?
These no-bake lemon cheesecake jars typically need 1–2 hours in the fridge. For best results, chill overnight so the filling becomes firm and the flavors meld beautifully.
Can I freeze no-bake cheesecake to make it set faster?
A quick 15–20 minute chill in the freezer can help, but avoid freezing fully—especially with yogurt, which can change texture. Refrigeration is still the best method.
Can I make no-bake cheesecake jars ahead of time?
Yes! These jars store well in the fridge for up to 4 days. Just add toppings right before serving to keep them looking and tasting fresh.
Can I swap Greek yogurt with something else?
You can replace Greek yogurt with sour cream or whipped topping if needed. Each gives a slightly different texture but still makes delicious lemon cheesecake in a jar.
What if I don’t have mason jars?
No problem! Use ramekins, small glasses, clear plastic cups, or any individual containers you have on hand. It’s still the same delicious mason jar dessert idea—just in a different dish.
Final Thoughts
I’ll never forget the first time I made these no-bake lemon cheesecake jars—it was a hot July afternoon, the kids were cranky, and I needed a dessert that wouldn’t turn my kitchen into a sauna. I pulled out a few mason jars, whipped up the filling with what I had on hand, and hoped for the best.
By the time dinner was done, those little jars had set up perfectly. I handed one to each kid, and you’d have thought I served up magic. Creamy, zesty, and just the right amount of sweet—every spoonful disappeared in minutes. Now they ask for “the lemon jar thing” all summer long.
So from one busy mom to another: tuck this recipe in your back pocket. Whether it’s for a party, a picnic, or just a little midweek win, these jars never disappoint.
Let me know if you try this — it’s become one of our favorite summer treats! ☀️
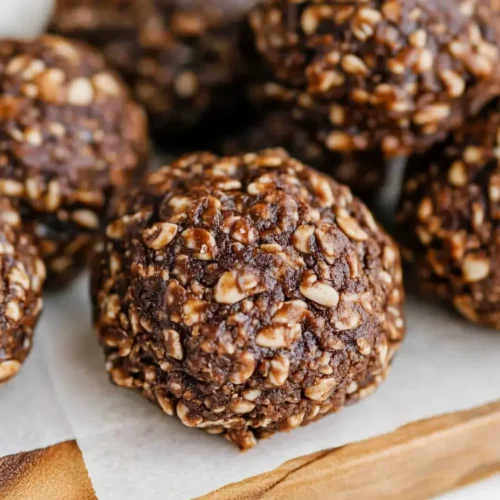
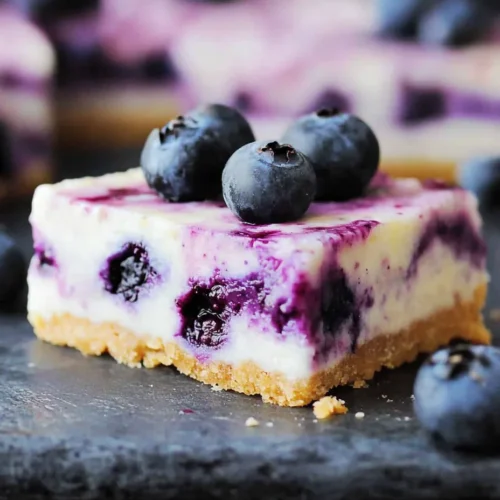
Craving more no-bake goodness? Try my Healthy No-Bake Blueberry Cheesecake Bars (No Added Sugar) or the delicious 3-Ingredient No-Bake Brownie Bites (Nut-Free & Refined Sugar-Free).